


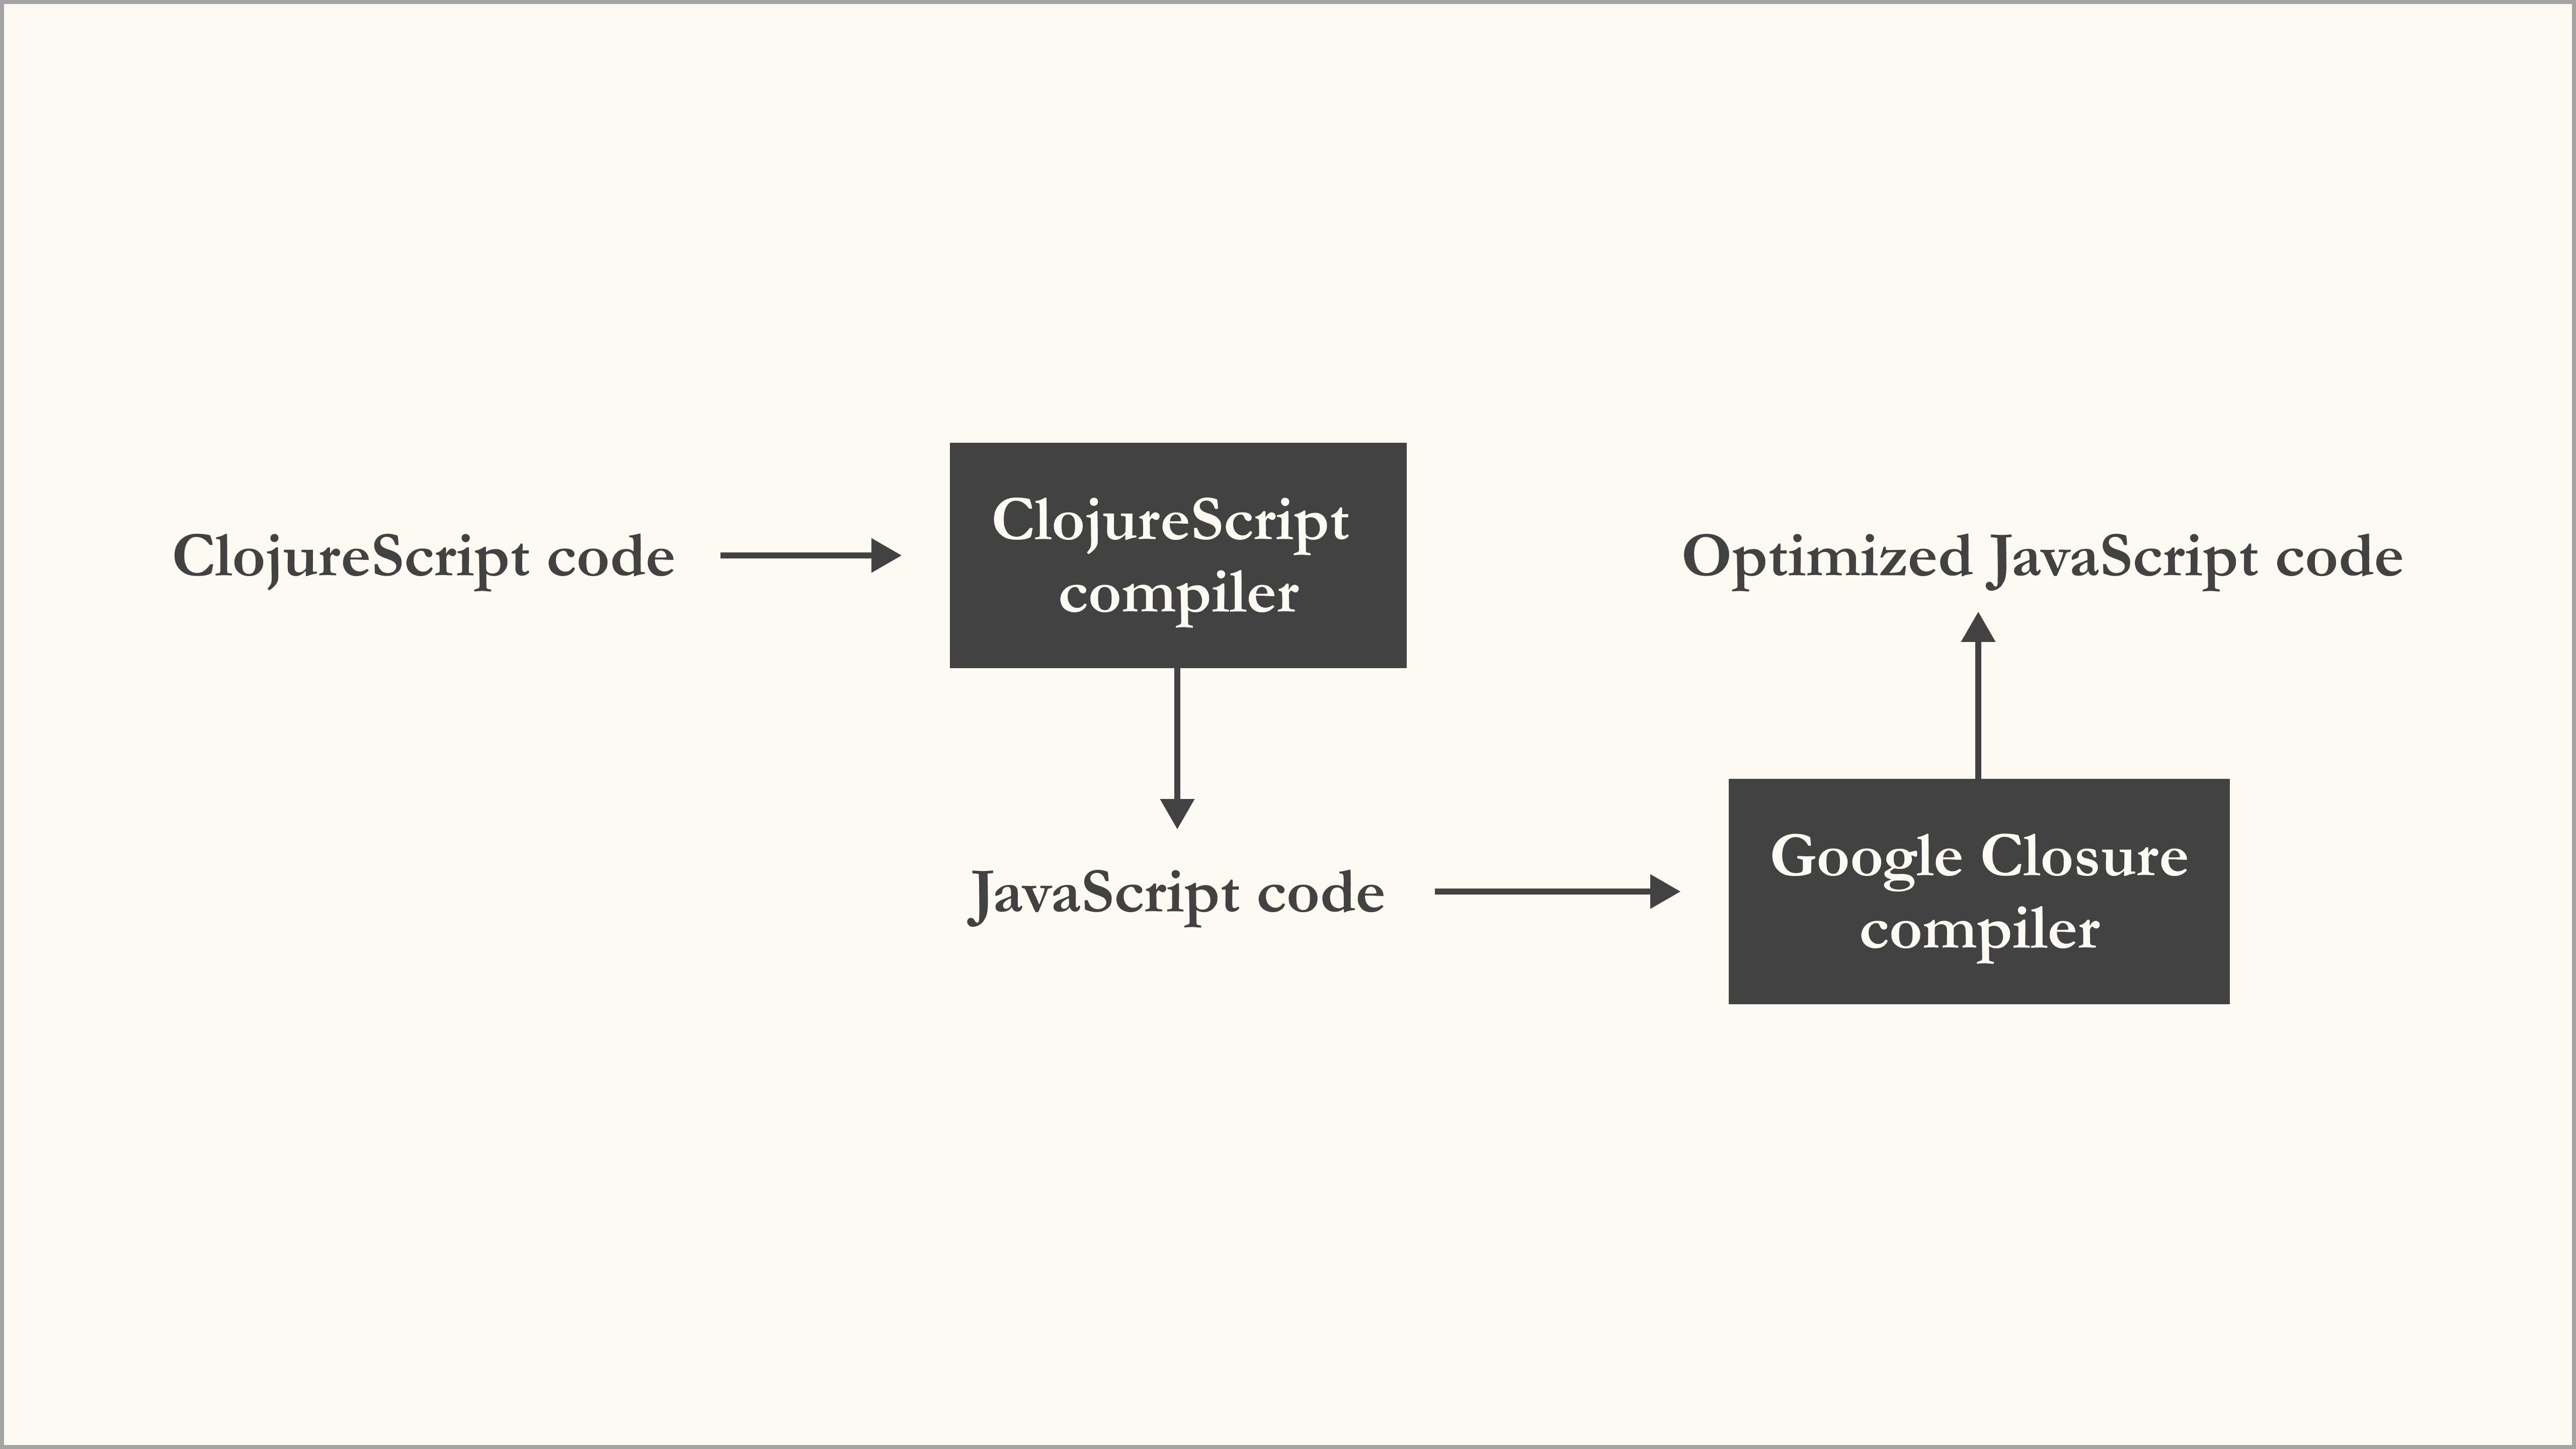
ClojureScript is a Clojure compiler that generates JavaScript code. Clojure is a high-level, functional programming language that runs on the Java Virtual Machine (JVM), and has access to all Java libraries. With ClojureScript, we can write Clojure code that runs in the browser, and everywhere JavaScript runs.
Why ClojureScript?
Since ClojureScript compiles to JavaScript, why bother about it?
One thing that has plagued JavaScript is the lack of standard structure. Almost anything goes. And it becomes easier to write bad code even though it works. We also have to keep up with different tools that transpiles newer versions of JavaScript and make them accessible to all browsers.
ClojureScript on the other hand is more opinionated than JavaScript. This way, it brings some structure to our code base by taking away those choices that made it possible for us to write bad code with JavaScript. Also, it comes with a much more extensive core library than JavaScript. This means that those simple tasks that require many lines of custom code or a third-party library with JavaScript to accomplish, we can often accomplish them with core ClojureScript functions.
After ClojureScript compiles to JavaScript, the compiled code has a smaller size than hand-written JavaScript. This is because it makes use of the Google Closure compiler for minification and optimization.
In this guide, we will walk through bootstrapping a new ClojureScript project with the clj-new tool, then create a counter web application with it.
Getting started
Before we can compile ClojureScript code, we need to install Java and Clojure on our device. In order to keep this guide focused on writing ClojureScript code, we will not go into details on how to install Java and Clojure. Follow this guide to make these installations. If you encounter any issues in your attempt to install them, you can make a comment about your issue at the end of this article.
To ensure that we have Clojure installed, we will run the clj command.
$ clj
Clojure 1.10.0
user=>
You should see the version of Clojure that was installed.
If you installed Clojure and the
cljcommand was not found, try running it in your PowerShell.
The prompt that we see after the Clojure version is printed is called the REPL. We can type Clojure expressions here and we should see the results immediately. For example
user=> (+ 4 9)
13
To close the REPL, we type CTRL + D, or CTRL + Z.
Bootstrapping a new project
Before we start developing our counter app, we need to set up a new project. There are different ways to set up a new ClojureScript project, but we will make use of the clj-new tool.
We need to add an alias for clj-new in the root directory of our device. We only need to do this once. For subsequent projects, or if you have done this step before, you can skip it.
We will open the ~/.clojure/deps.edn file at the root of our device and paste the following code.
{
  :aliases
    {:new {:extra-deps {seancorfield/clj-new
                        {:mvn/version "1.1.243"}}
          :exec-fn clj-new/create
          :exec-args {}}}
}
Setting up ClojureScript might seem overwhelming, but that's only because this is our first time, and we have to first make our device ready to go. To set up subsequent projects, we will not need to go through all the processes above. We will just need to do the following.
clj -X:new :template figwheel-main :name getting_started/counter :args '["+deps"]'
This command uses the clj-new tool to bootstrap a new ClojureScript project.
If you get some error after running the command above, try to wrap
+depsin triple quotes as soclj -X:new :template figwheel-main :name getting_started/counter :args '["""+deps"""]'
Let us analyze the command above. clj -X:new, calls the clj-new/create function (remember the clj-new tool we added an alias for). Then it passes the remaining arguments to it. The options :template, :name, and :args are passed using the Clojure keyword syntax.
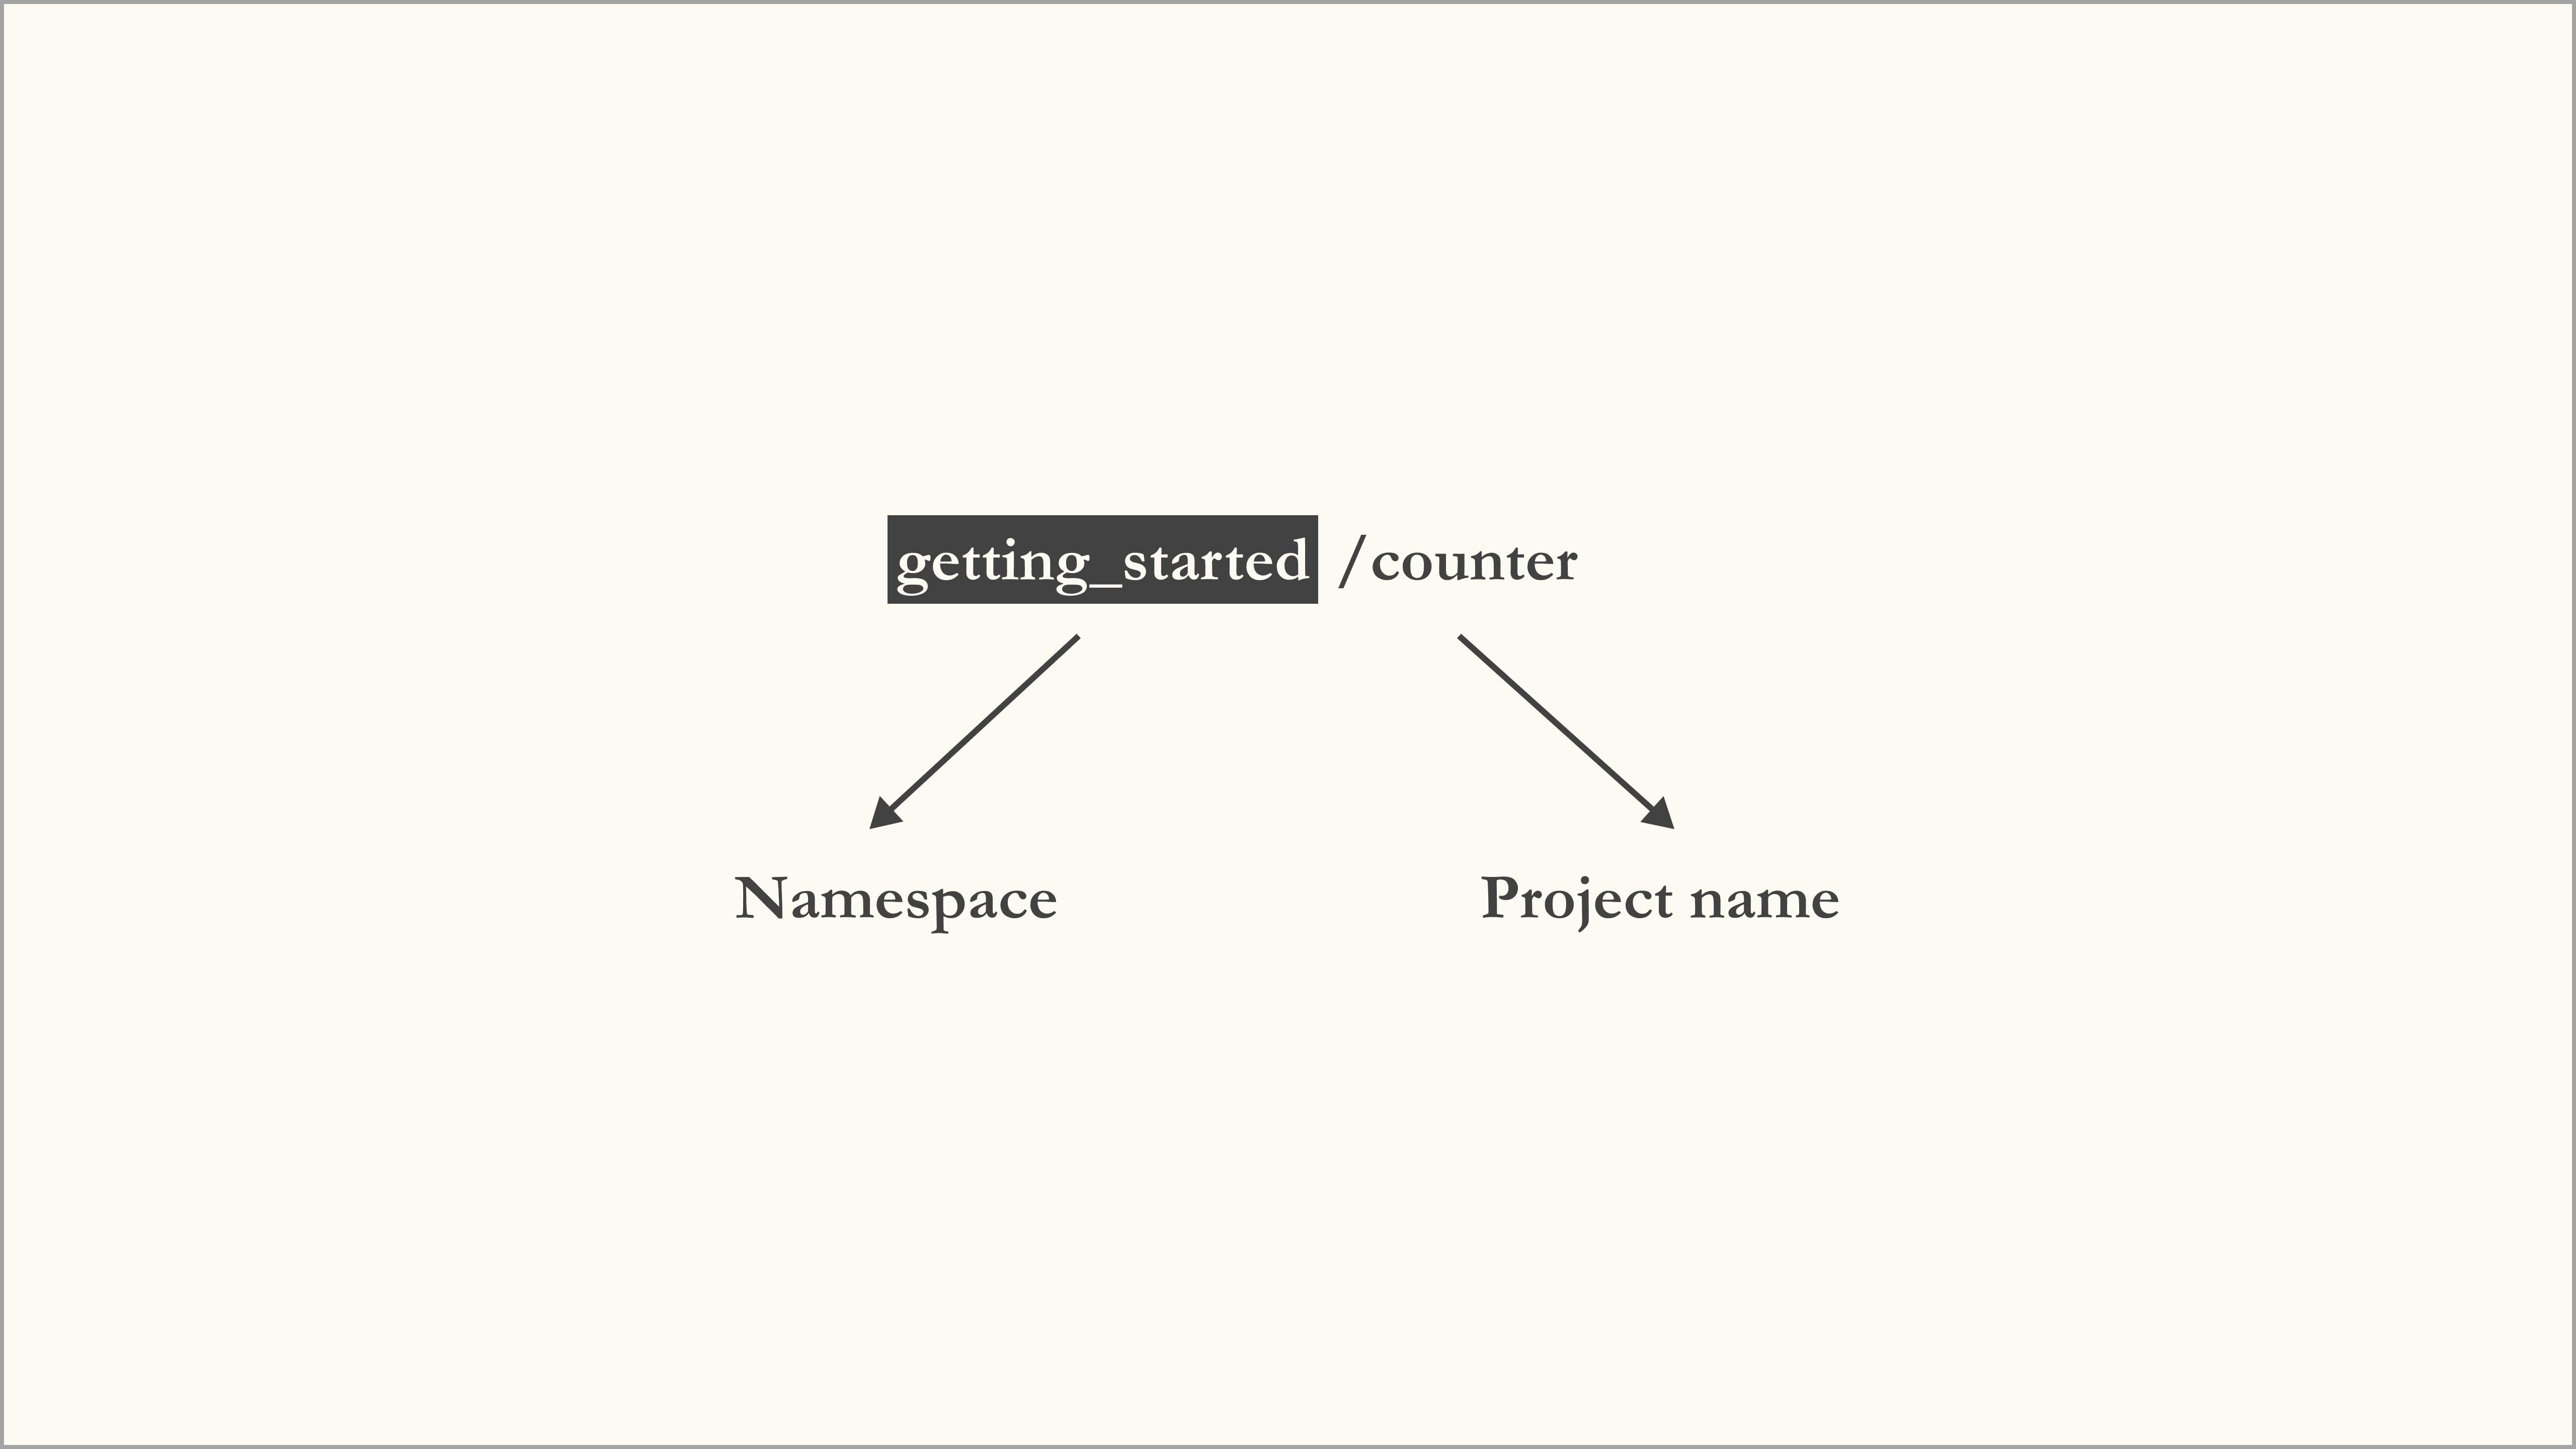
:templategives the name of the template to use. Here we are usingfigwheel-main. Figwheel Main helps with building our code and to hot-reload in development.:nameis the name of the project we are building. We have to specify a namespace-qualified name for our project. The namespace is the part before the forward slash and is usually a more general name not specific to the project, like your GitHub username, or organization name; while the part after the forward slash is the name of the project
:argsare additional parameters that thefigwheel-maintemplate will understand. We specify that we want to use adeps.ednfile to manage dependencies
After running the command to create a new project, we will navigate into the generated directory, which is the project name, in our case, counter. We should also open up the directory in a code editor.
cd counter
Now, let us examine the files and sub-folders that were generated.
- The
resourcesfolder is where our HTML and CSS live - The
srcfolder is where we will write our core ClojureScript code - The
testfolder is where we will write our ClojureScript tests, although, in this guide, we are not interested in writing tests. The
deps.ednis the dependency manager for our project, similar to whatpackage.jsonis for JavaScript. Here, we specify the dependencies, paths, aliases, and other keys.:pathstellscljwhere Clojure code resides:depstellscljthe dependencies we require in our app.:aliasesis used to specify shortcuts for long commands, and we can include other alternate dependencies here.
dev.cljs.ednis used to add configuration for Figwheel MainThe configuration we add to
dev.cljs.edncan also be added tofigwheel-main.edn. But the configuration infigwheel-main.ednwill be overriden by those indev.cljs.edn.test.cljs.ednis where we have our tests configuration- The
targetfolder is where the compiled code goes to
Starting our app
There are different ways to start a ClojureScript app, and this depends on how it was created. Since we created our project with clj-new and the Figwheel Main template, we will start our app by running the following command.
clj -A:fig:build
Recall that if a
cljcommand fails in your regular terminal, try running it in your PowerShell.
This command fetches all the dependencies we require, launches a ClojureScript REPL, and then opens a browser window with the following page at localhost:9500
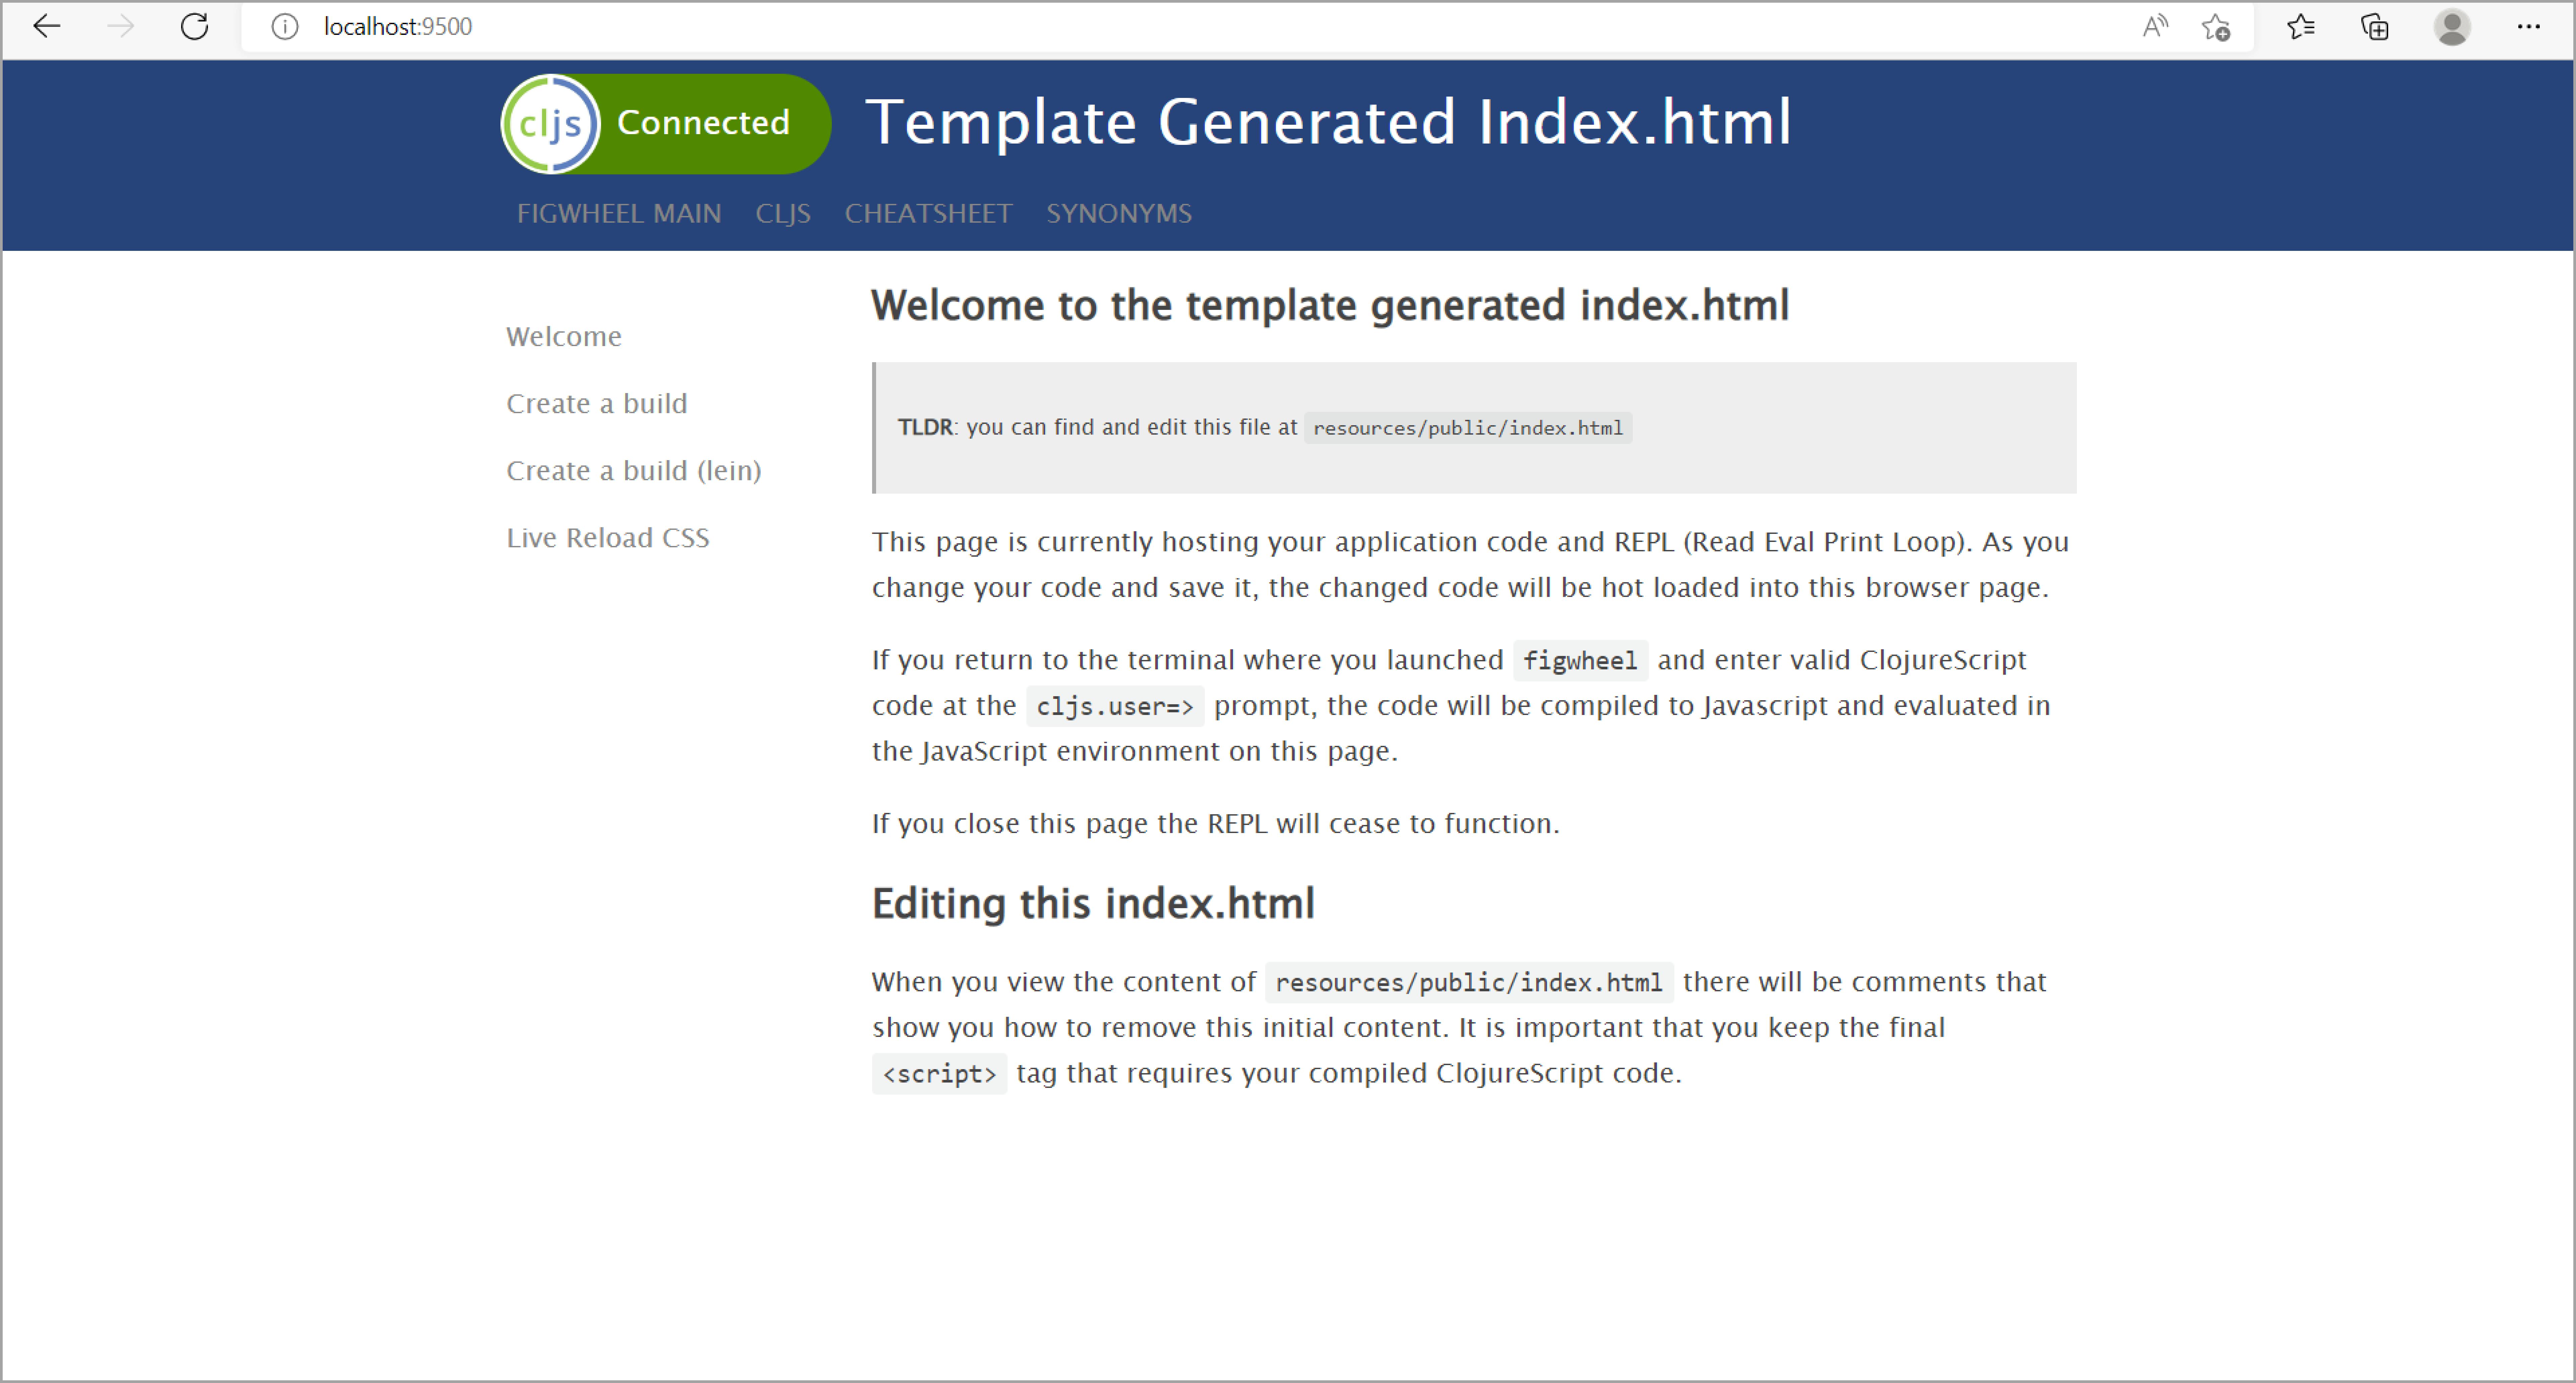
The green-background "Connected" text at the top left of the generated webpage, next to the ClojureScript logo, means that the page has successfully connected to the REPL that we just launched. The REPL is in the same terminal where we ran the command to start our app. The generated webpage is the host JavaScript environment for the REPL. This means that all ClojureScript expressions that we execute in the REPL are immediately compiled to JavaScript and executed in the webpage. Let us see how this works.
The REPL
REPL means Read-Eval-Print Loop, because it reads the ClojureScript expression we type into it, evaluates the expression in the browser, then prints the result and continues the loop.
With our webpage at localhost:9500 still open, let us execute some expressions in the REPL. This is what our command line looks like after starting the app.
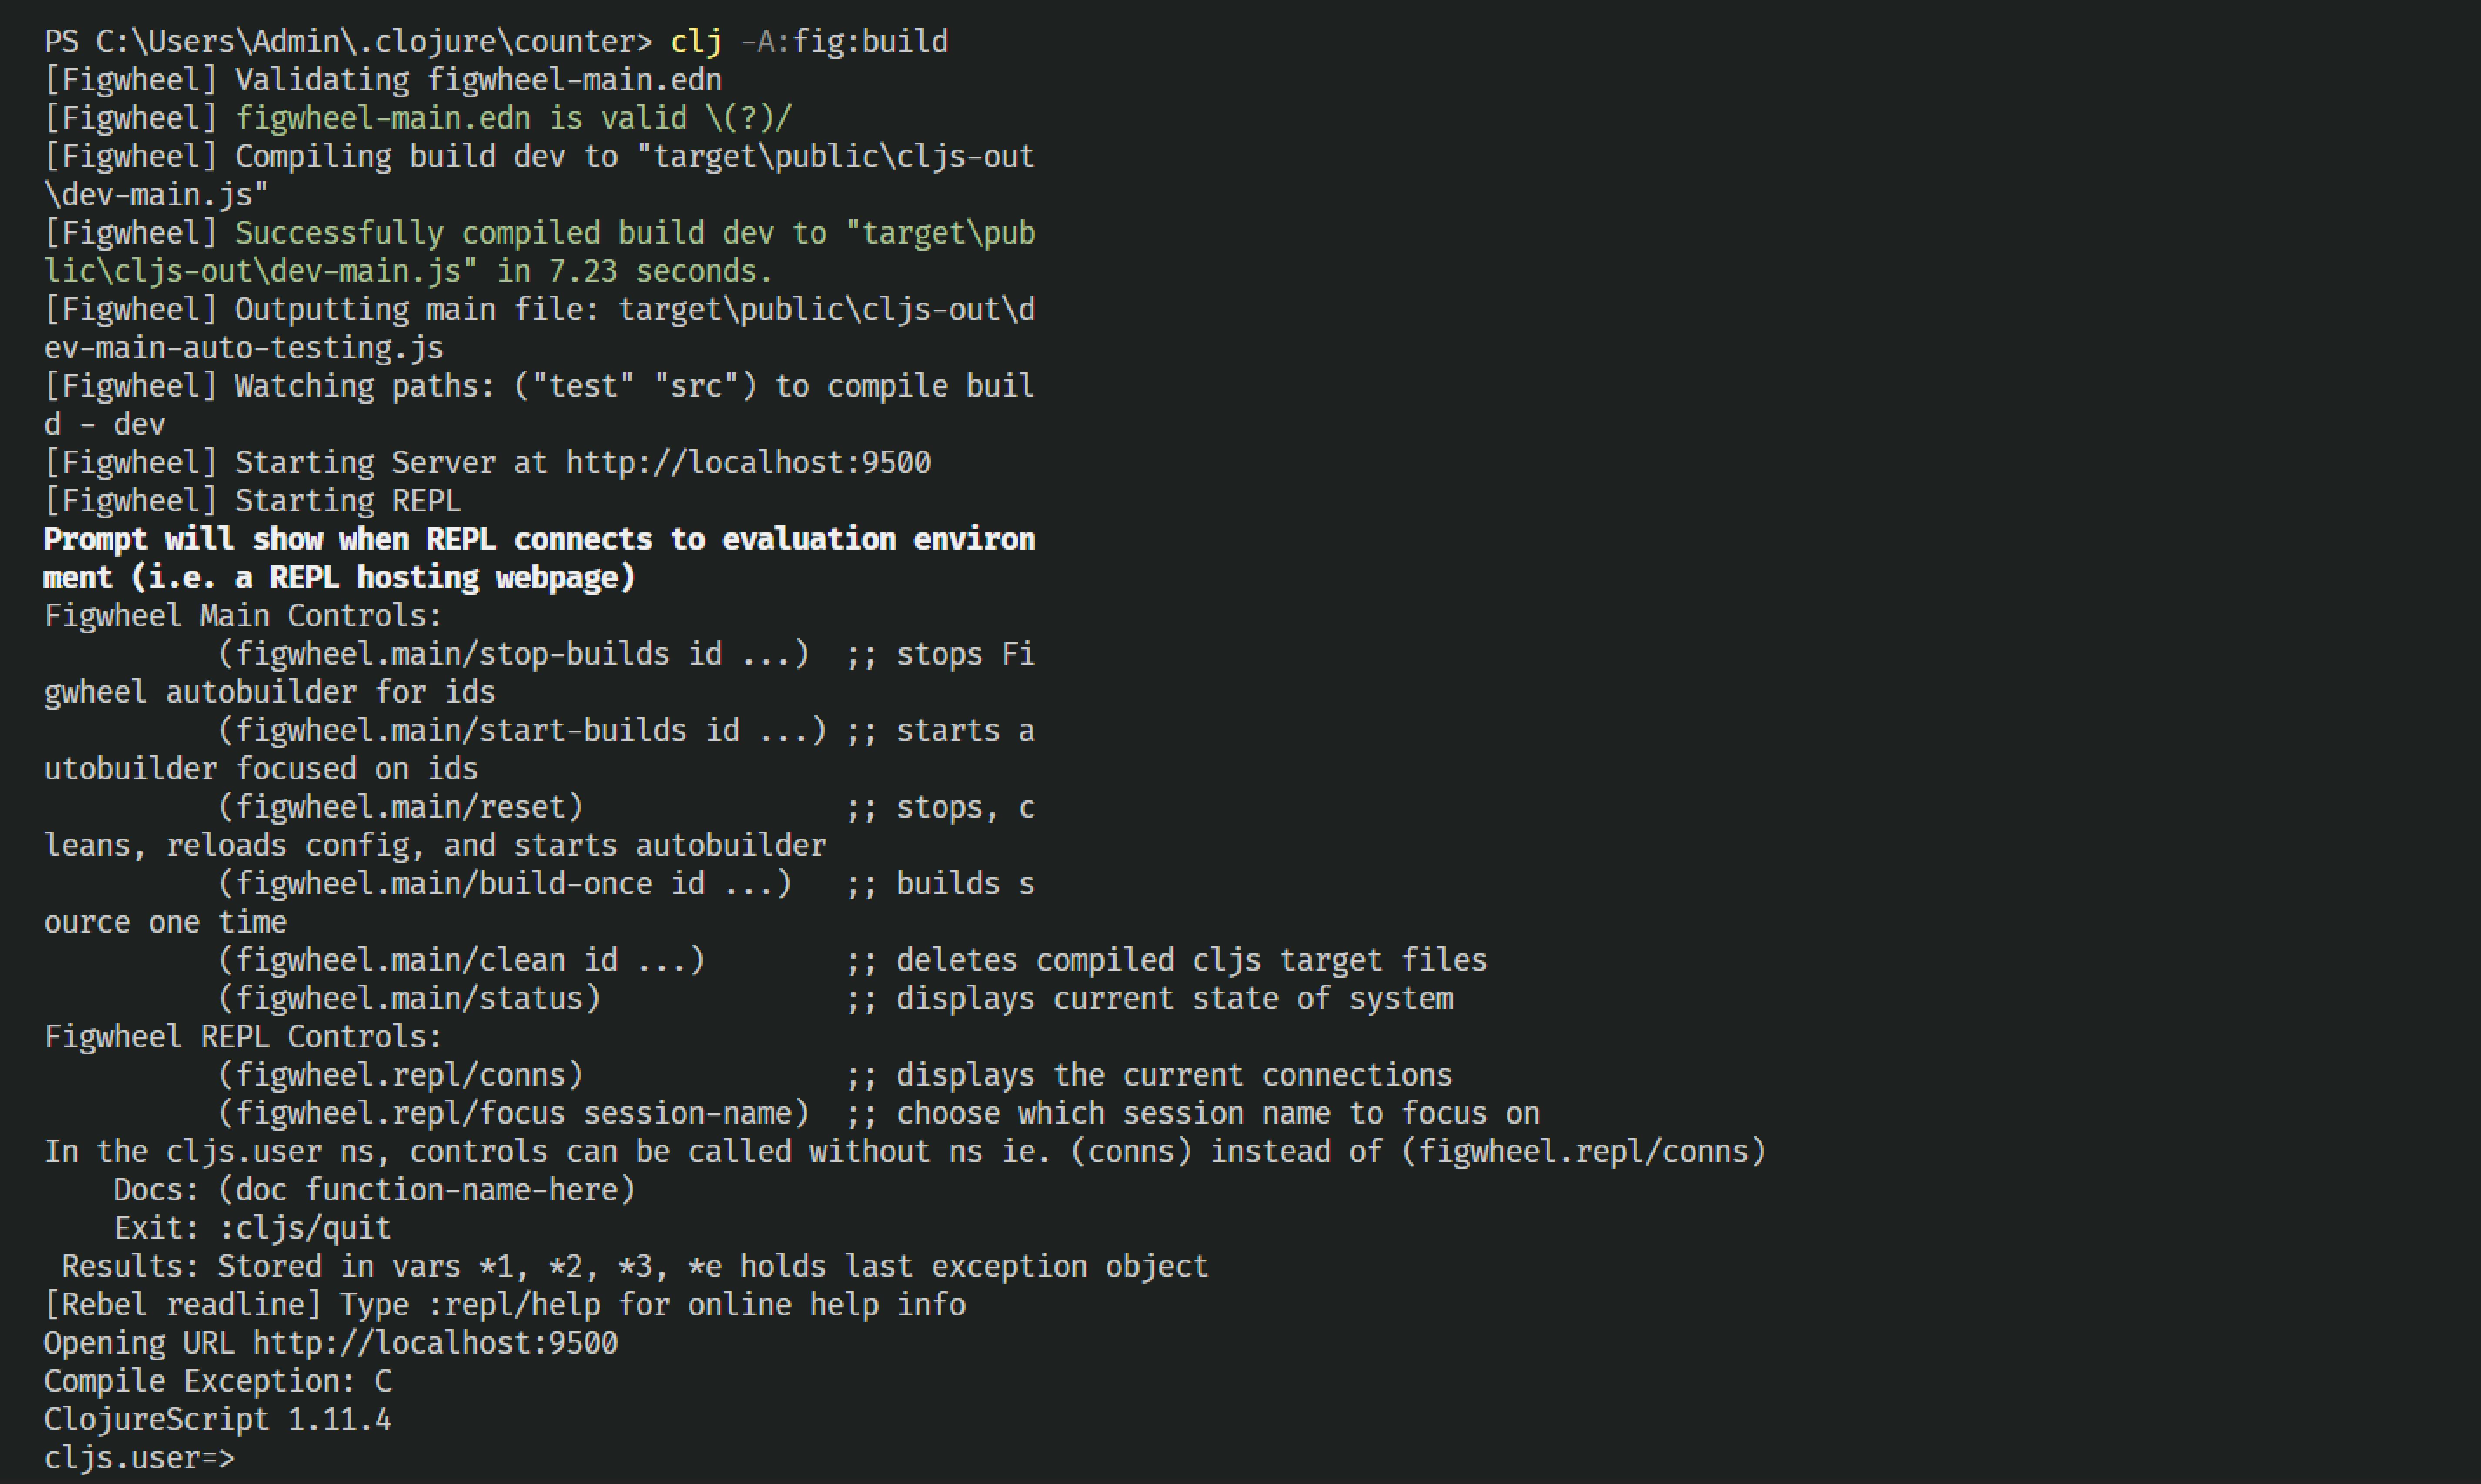
We can type the ClojureScript expressions just after the cljs.user=> prompt.
cljs.user=> (println "Here we go!")
Here we go!
nil
cljs.user=> (+ 4 5)
9
cljs.user=> (js/alert "This is an alert!")
nil
cljs.user=> (js/console.log "This is a log to the console!")
nil
Executing a ClojureScript expression executes their side effects and returns the return value. If there is no return value, nil is returned.
- The first expression prints "Here we go" to the console and the REPL
- The second expression adds 4 to 5 and returns the answer
- The third expression causes a JavaScript alert to pop up in the webpage at
localhost:9500 - The last expression logs the string to the console in our webpage
We have been able to interact with the webpage through the running REPL. We have also been able to use JavaScript functions alert and console.log in ClojureScript. Up next, we will create the UI for our counter app.
Let's write some UI code
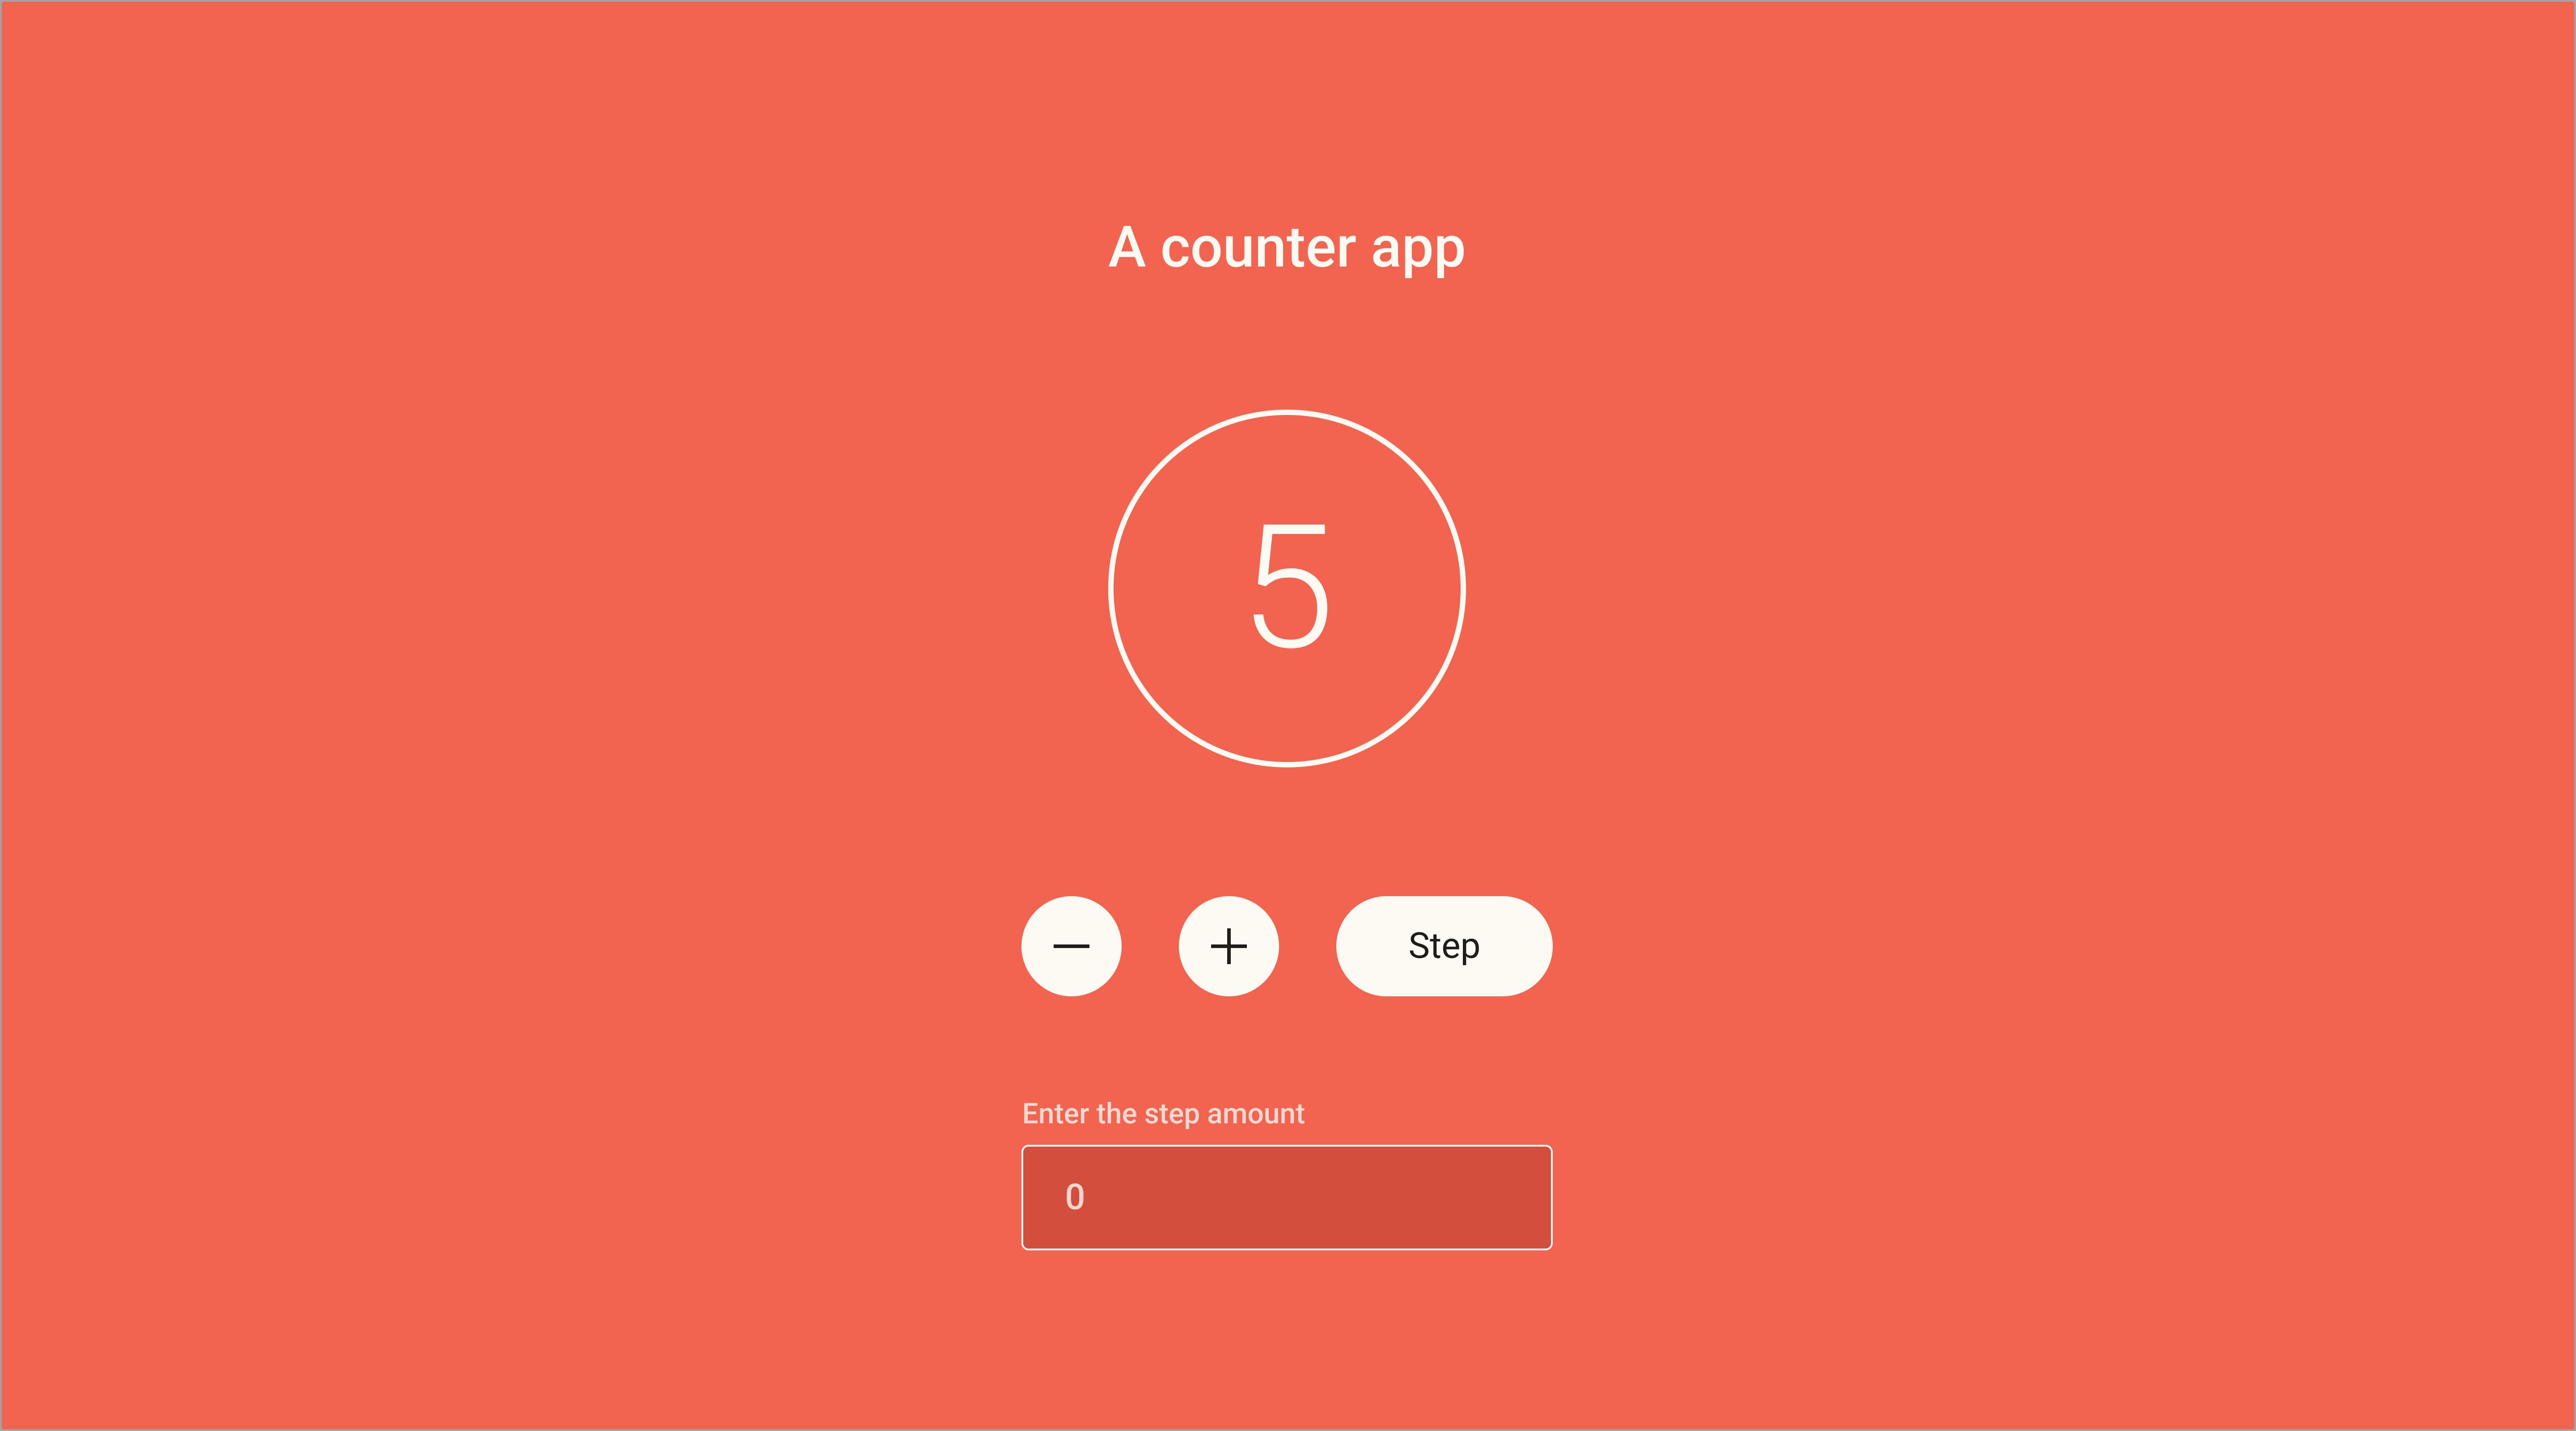
Just as was mentioned earlier, we will create a counter web application. The count on the UI increases by 1 when we click the + button and decreases by 1 when we click the - button. We can update the count by any value by typing the value (positive or negative), in the input field, then clicking on the step button.
Currently, what we have on the webpage is the default template that Figwheel generates. We can find the code in the resources/public/index.html file. We will delete the content of the file and replace it with the following markup for our counter app.
<!-- resources/public/index.html -->
<!DOCTYPE html>
<html>
  <head>
    <meta charset="UTF-8" />
    <meta name="viewport" content="width=device-width, initial-scale=1" />
    <link href="css/style.css" rel="stylesheet" type="text/css" />
    <link
      rel="icon"
      href="https://clojurescript.org/images/cljs-logo-icon-32.png"
    />
  </head>
  <body>
    <div id="app">
      <h4 class="header-text">A counter app</h4>
      <div class="count-container">
        <h2 class="count-value" id="count-value">0</h2>
      </div>
      <div class="btn-group">
        <button id="minus">-</button>
        <button id="plus">+</button>
        <button id="step">Step</button>
      </div>
      <form>
        <label for="step-input">Enter the step amount</label>
        <input type="number" value="0" id="step-input" />
      </form>
    </div>

    <!-- KEEP THIS SCRIPT TAG : IT LOADS YOUR APPLICATION CODE -->
    <script src="cljs-out/dev-main.js" type="text/javascript"></script>
  </body>
</html>
Take note of the line where we included the script <script src="cljs-out/dev-main.js" type="text/javascript"></script>. This imports the generated JavaScript code from target/public/cljs-out/dev-main.js to the HTML page.
All our CSS styles should go into the resources/public/css folder. Inside the folder, there is already a style.css. We open the file in our editor, and place the following CSS styles in it.
/* resources/public/css/style.css */
body {
  background: #f46351;
  padding: 0 24px;
}

* {
  font-family: Roboto, Helvetica;
}

#app {
  display: flex;
  flex-direction: column;
  align-items: center;
  width: 100%;
  padding-top: 72px;
}

.count-container {
  width: 200px;
  height: 200px;
  display: flex;
  align-items: center;
  justify-content: center;
  border: 3px solid #fffaf5;
  border-radius: 494px;
  margin: 72px 0;
}

.header-text {
  font-weight: 500;
  font-size: 32px;
  line-height: 38px;
  color: #fffaf5;
}

.count-value {
  font-style: normal;
  font-weight: 300;
  font-size: 96px;
  line-height: 112px;
  color: #fffaf5;
}

.btn-group {
  display: flex;
  align-items: center;
}

button {
  font-weight: 400;
  font-size: 20px;
  line-height: 23px;
  color: #211c1b;
  border: none;
  outline: none;
  border-radius: 50%;
  height: 56px;
  cursor: pointer;
}

#minus,
#plus {
  width: 56px;
  margin-right: 32px;
}

#step {
  width: unset;
  padding: 16px 40px;
  border-radius: 56px;
}

form {
  margin: 56px 0;
  width: 100%;
  max-width: 295px;
}

label {
  font-weight: 500;
  font-size: 16px;
  line-height: 19px;
  color: rgba(255, 250, 245, 0.79);
  display: block;
}

input {
  margin-top: 8px;
  background: rgba(163, 49, 34, 0.4);
  border: 1px solid #fffaf5;
  border-radius: 4px;
  font-weight: 500;
  font-size: 20px;
  line-height: 23px;
  color: rgba(255, 250, 245, 0.79);
  padding: 18px 24px;
  outline: none;
}
If we refresh our browser, we should see the beautiful interface for our counter app with three buttons and an input field, but it is as good as useless because we cannot interact with it. Up next, we will make the app interactive, that is, it will listen to events from the user, perform some logic and respond with an update to the UI.
Let's add some interactivity
It's time to write some ClojureScript code. Recall that based on the structure of our project, all ClojureScript code goes into the src folder. For our counter app logic, we will add the code to the src/getting_started/counter.cljs. Open the file and replace the content with the following lines of code.
;; src/getting_started/counter.cljs
(ns ^:figwheel-hooks getting-started.counter
  (:require
   [goog.dom :as gdom]
   [goog.events :as gevents]))

;; define your app data so that it doesn't get over-written on reload
(defonce app-state (atom 0))
(def step-input (gdom/getElement "step-input"))
(def count-value (gdom/getElement "count-value"))
(def app-element (gdom/getElement "app"))

(defn get-step-input-value []
  (js/Number (.. step-input -value))
)

(defn render-new-count [val]
  (gdom/setTextContent count-value val)
)

(defn increase-count [app-state]
  (swap! app-state inc)
)

(defn decrease-count [app-state]
  (swap! app-state dec)
)

(defn step-count [app-state]
  (swap! app-state + (get-step-input-value))
  )

(defonce is-initialized?
  (do
    (gevents/listen app-element "click"
      (fn [event]
        (condp = (aget event "target" "id")
          "minus" (decrease-count app-state)
          "plus" (increase-count app-state)
          "step" (step-count app-state)
          nil)))
    (add-watch app-state :counter-watcher
      (fn [key atom old new]
      (render-new-count new)))
    true))
If you are new to Clojure or ClojureScript, it probably surprises you to see that we are using hyphens - in variable names. We name identifiers in Clojure(Script) with hyphen-separated lowercase words.
You must have also noticed that almost everything we write is enclosed in parentheses. This is what we call symbolic expressions ("s-expressions"). It is a parenthesized list containing zero or more expressions separated by white space. An s-expression can contain other nested s-expressions.
The first line of code in our counter.cljs file is a comment. In ClojureScript, lines of comment are preceded by a double semi-colon ;;
Next, we define a namespace. In ClojureScript, the unit of modularity is the namespace. To define a namespace, we use the ns form.
(ns name-of-namespace)
The name of a namespace has to rhyme with the path of the file relative to the src directory.
- Replace the path separator
/or\with a dot. - Replace underscores
_with hyphens- - Finally, drop the filename extension
.cljs
In our case, the path of our file relative to the src directory is getting_started/counter.cljs. Applying the rules above to get a valid name for our namespace, we get getting-started.counter.
(ns getting-started.counter) is a valid namespace declaration, but we added the ^figwheel-hooks annotation to notify figwheel to watch the namespace.
After defining the namespace, we require code from other namespaces. Here, we are requiring code from the goog.dom and goog.events namespaces. The :as keyword makes the functions in this goog.dom namespace available under the alias, gdom. This means that, to call a function in the namespace, we do gdom/function-name instead of goog.dom/function-name. Likewise, we make the goog.events namespace available as gevents.
Both the goog.dom and goog.events namespace are made available by the Google Closure's DOM manipulation library which ClojureScript has integrated.
After defining the namespace and requiring code from the Google Closure library, we start writing code for our counter app. First, we define the app's state with defonce app-state (atom 0). This is the current value of the counter. We use defonce because we don't want the data to get overridden on reload.
Then, we use the gdom/getElement function to retrieve some elements from the DOM by id and we bind them to variables.
Next, we create a couple of functions that implement the logic of our counter app. In ClojureScript, the syntax to define a function is.
(defn function-name [arg-1 arg-2 arg-n]
  ;; function body
)
And we can call a function on argument(s) using the s-expression. The function name is the first item in the expression and the arguments, if any, are placed in order after the function name separated by white space.
(function-name arg-1 arg-2 arg-n)
The get-step-input-value function receives no argument, gets the value of the step-input input field, and converts it to a number.
The render-new-count function receives an argument val, and updates the count-value DOM element with it. The count-value DOM element is where we are displaying the current value of the counter.
The increase-count function uses the swap! and inc functions to update app-state by increasing its value by one. The decrease-count function reduces app-state by one. The step-count function calls the get-step-input-value function to get the value of the step-input field. It then adds this value to app-state and updates it.
Finally, we create an is-initialized variable. We use defonce because we want it to run just once. We use the do macro to evaluate multiple expressions and assign the last value true to is-initialized. This means that once the app loads, it evaluates all of those expressions, and once completed, the value of is-initialized becomes true. We can use this value in some other function to check if the app has been initialized before performing some actions. Although in our app, we did not use it.
The first expression we evaluated with the do macro does the following
- Listen for click events in the app
- Check the id of the DOM element clicked
- If the id is "minus", call the
decrease-countfunction onapp-state - If the id is "plus", call the
increase-countfunction onapp-state - If the id is "step", call the
step-countfunction onapp-state - If the id is none of the above, return
nil, which is ClojureScript's equivalent fornullorundefinedin JavaScript
The second expression watches for changes to the app's state, app-state, and renders the new count to the DOM.
Before we start our app, we need to stop Figwheel Main from watching the test files since for this guide, we are not interested in tests. We can do this by updating the dev.cljs.edn file.
-  ^{:watch-dirs ["test" "src" ]
+  ^{:watch-dirs ["src" ]
      :css-dirs ["resources/public/css"]
      :auto-testing true
     }
   {:main getting-started.counter}
With these out of the way, we can start our app by running clj -A:fig:build.
Conclusion
We went through the process of setting up a ClojureScript project with the clj-new tool, and we were able to make use of some of the rudimental concepts in ClojureScript to build a working counter application.
If this was your first encounter with ClojureScript and it catches your fancy, you may want to check out some of these amazing resources to learn more about it.